There are so many decisions to make when looking at the blank slate of a dollhouse, if it is a kit. I think building from scratch would bring an avalanche of even more decisions! Style is the first thing you have to determine. That will lead you to other decisions. Not just style, but the time period as well.
 |
| Photo by David E. Taylor, reprinted with permission https://faculty.wcas.northwestern.edu/~infocom/scndempr/missouri/outevgal01.html |
Color...color was the bane of my existence. I'm color deaf like some people are tone deaf. Don't ever ask me if a color belongs to a certain family or if it is warm or cool. I couldn't tell you to save my life.
I tried to get my mom to help. She is a natural artist, and she is like the Martha Stewart of our little town. The woman can decorate like you wouldn't believe. She could have her own HGTV channel! I dragged her up to my workroom and she was very hesitant to give specific answers. She's a smart mom and realized I needed to find my own way. After a lot of agonizing, I selected some scrapbook paper designs I liked; I wanted to have "mural" type wallpaper in the formal rooms.
Inspiration Photo: Muraled Wall
I also found shiny rose gold foil scrapbook paper that would work for my tin ceiling. While I wanted something similar to the ceiling below, I was concerned about how to attach it securely to the ceiling. I found a good solution, but it unfortunately wasn't close to the beautiful ceiling below.
 |
| Photo reprinted with permission from This Old House https://www.thisoldhouse.com/ceilings/21018492/all-about-tin-ceilings |
Armed with these samples I headed off to Home Depot (the closest home improvement store) in search of paints to match.
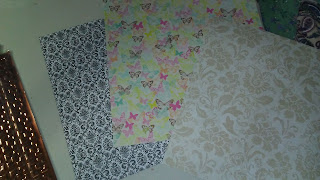 |
| Butterfly themes are big for Victorians! On the far left is my embossed tin ceiling. |
 |
| Scrapbook paper being considered for wallpaper |
 |
| Scrapbook paper that made the cut. |
In the paint department I stuck gold! Chris, the employee on duty when I arrived, is an art major with a degree in Art. How Home Depot was lucky enough to hire him, I don't know. But he was able to help me pick out colors that went with the wallpaper. I wish every paint department could hire a Chris. Otherwise, my Pierce would not have been looking as good as it does today! I give him a lot of credit. Every so often when I pop in, I show him updated photos. The best I can do for him is complete a store survey extoling his virtues. I wish he could take tips!
After getting over the "color" blockage, I was able to move forward with the research. I looked at umpteen pictures on Google to determine how to present my tin ceiling. I decided to make a coffered ceiling over the tin work.
 |
| Photo reprinted with permission from Midwestern Wood Products Co. www.woodgrid.com |
I spent time researching flooring too. I wanted intricate tiled mosaic floors, but only having access to wood (at that time) I thought it was beyond my skill level. I knew I wanted subway tiles in the bathroom as well. My concern was how would I ever replicate the rounded top edge?
 |
| Photo reprinted with permission from Clay Squared to Infinity https://claysquared.com/showroom/historic-tile-collections/flat-edge-tile-collection/ |
Because I had a coffered ceiling in the living and dining room, and I was going with beams in the kitchen, I would not need molding on the ceiling. But I knew I wanted a ceiling rosette for the light fixtures. I spent a lot of time deciding if I wanted battery operated individual lights or wanted to wire the whole house. I decided to keep it simple and went with battery operated LED lights. But that is a whole entry to itself!
Now my basic research was done, and colors selected, all I had left was to get started. Next up: The Pierce Staircase - Keep or Ditch?
Comments
Post a Comment